Thursday, June 18, 2015

How to take wide angle photos with a cell phone: Hollywood Sign- from a good to a great photo in 5 seconds.

This weekend, I took a friend to hike on the Mt Lee which has world famous Hollywood sign on. This is a very nice, popular hike in LA. It is sad that the residents of the area, near Beachwood Rd, have made parking a nightmare. Most of the spots require permit so you really need to know me well to get some inside tips on where to park when you are thinking on hike on the Hollywood Sign hike- Mt Lee. Anyway, this is a photography blog so I don't want to bore you with hiking details.

When reached the top of Mt Lee, we were above (behind) the famous Hollywood sign. We want to take a photo but when I took a photo with my camera, unfortunately my camera did not have wide angle necessary to get the whole sign in the background. Immediately, I had an idea. I took a regular photo with my Samsung Note 4 camera.
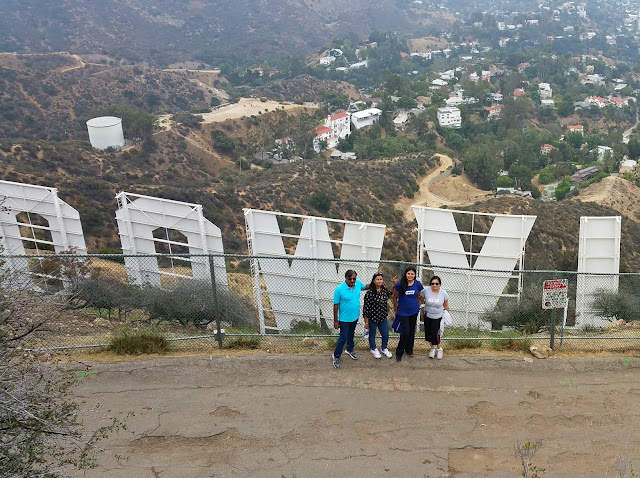
Hollywood sign hike
Hollywood Sign hike
Still the cell phone camera was not wide angle enough. So I changed the setting to Panaroma and moved my camera left to right. Within 5 more seconds, I had the whole sign in the background. It is all trial and error photography. Once I found what problem I had, I tried to find a solution and I had a nice photo.
Beautiful Hollywood sign photo
Trial and error photography- one easy way to take great photos.

Tuesday, June 2, 2015

Take a better photo by moving people around with Trial and Error Photography

Yesterday I was taking photos at my son's school - Vista Fundamental Elementary School in Simi Valley. 3rd Grade classes had Apple Valley days and there was graduation ceremony. After the event was over, my wife and some of other moms asked me to take there photo. It was a mid day with harsh Sun. Luckily they were standing under a tree. I knew that under the shade, I had better chances for taking a good shot. However I didn't know in which direction to stand them. As most of us know, light is a very important factor in photography. In open space, there are variety of things that reflect light of different quality and in different directions. Brighter surfaces reflect more light and some surfaces make light even softer. I didn't know which direction which spot will work the best. As I wasn't sure, I decided to stand them in 2-3 different directions and take photos.

Here is the first photo.
Day light portrait
Daylight portrait

I made them face South direction. Probably the background was too bright or may be the grass below didn't reflect back light well. Photo didn't come out good. I wasn't happy plus I like to try to take a better photo. I moved them to face the East. Look at the second photo:
ladies group portrait
Facing East.

Photos in natural lightWhen this group of ladies faced East, the photo got worse. Now I knew if I ask them more times, I would get in trouble. Other 3 moms would probably not show their annoyance but I wasn't sure about my wife. Anyway, I wanted to take one more chance. I asked them stand facing the West. Somehow it worked very well. I took 2 quick photos. I showed photos to them and I know all 4 of them were happy. They complemented me for being a good photographer. Photos did come out bright with natural skin tones. We were able to use natural light to make a nice group photos for these 4 moms. For me, it was just a Trial and Error way of photography.  As I keep saying, photography shouldn't be that tough. We don't need to take classes or get into technical theories. Follow two simple steps of Trial and Error Photography. Take a shot. Find an issue and try to correct it.

Enjoy photography.